 Justin's Home Solutions
How to Fix a Leaky Faucet (Beginner-Friendly DIY Guide)
That drip… drip… drip isn’t just annoying—it can waste up to 3,000 gallons of water per year. Thankfully, fixing a leaky faucet is one of the easiest DIY plumbing projects you can tackle. In this guide, I’ll show you how to repair a faucet step by step, even if you’ve never picked up a wrench before.
Step 1: Identify Your Faucet Type
Not all faucets are created equal. Knowing what kind you have determines the repair process:
- Compression faucet – Separate hot/cold handles, uses rubber washers.
- Cartridge faucet – Single lever, uses a cartridge inside.
- Ball faucet – Common in older kitchens, contains springs and O-rings.
- Ceramic disk faucet – Modern, durable, uses a ceramic cylinder.
Step 2: Gather Tools and Materials
- Adjustable wrench
- Screwdrivers (flathead + Phillips)
- Allen wrench (if needed)
- Replacement part (washer, cartridge, or O-ring)
- Plumber’s grease
- Rag or towel
Step 3: Turn Off the Water Supply
Locate the shutoff valves under the sink and turn them clockwise. If you don’t have them, shut off the main supply. Open the faucet to drain any leftover water.
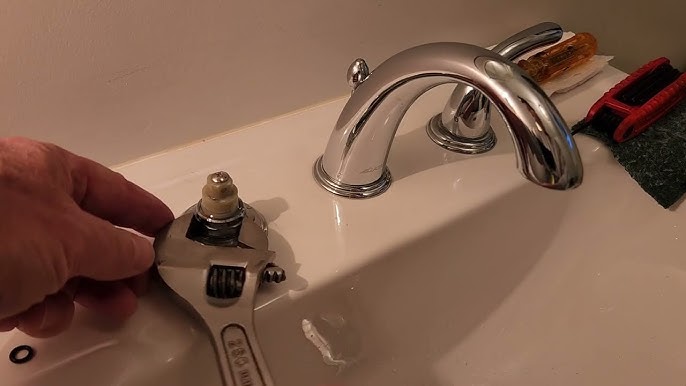
Step 4: Remove the Handle
- Pop off any decorative caps.
- Unscrew the handle screw with a screwdriver or Allen wrench.
- Pull off the handle to expose the cartridge or washer.
Step 5: Replace the Faulty Component
- Compression faucet: Swap the rubber washer.
- Cartridge faucet: Replace the cartridge.
- Ball faucet: Replace O-rings and springs.
- Ceramic disk faucet: Replace the ceramic cylinder.
Step 6: Reassemble and Test
Reassemble the faucet in reverse order, turn the water back on, and test for drips.
Final Thoughts
Fixing a leaky faucet costs less than $10 in parts and saves you hundreds in wasted water. It’s an easy win for beginner DIYers and a great way to build confidence for future plumbing projects.
← Back to Blog